 19.05.2012, 19:14
|
#1 |
|
Участник
|
sumitsaxfactor: Create Your First Custom Service [AX 2012]
Источник: http://sumitsaxfactor.wordpress.com/...rvice-ax-2012/
============== As AX has advanced, so has its integration with WCF. One of the good concepts that MS has introduced in AX 2012 is custom services. With custom services, anything and everything in AX can be exposed as Windows Communication Framework (WCF) service. This article concentrates on helping you create your first custom service. For creating and exposing custom service, following steps are involved:
Simple Scenario: The scenario we will take in this examples is customers. We will write a service to fetch all customers from default company. Add these customers to a list. Now select a subset of customers, pass it back to Ax and get their names. With this we can see how we can set and get an array of values. Create Custom Service Class Do the following:
/// Custom service class to demonstrate the creation and consumption of WCF services from AX /// /// /// This is the custom service class for fetching customer ids and customer names /// class SamCustomServiceTest { }
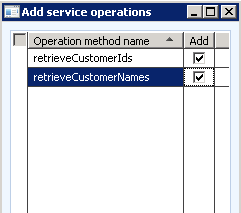
/// Gets a list of customer ids from the specified company /// /// /// List of customer Ids /// /// /// AifCollectionTypeAttribute is used to define strongly typed containers for data /// [AifCollectionTypeAttribute('return', Types::String), SysEntryPointAttribute(true)] public List retrieveCustomerIds() { List resultSet = new List(Types::String); CustTable custTable; whileselect custTable { resultSet.addEnd(custTable.AccountNum); } return resultSet; }
/// Gets a list of customer ids from the specified company /// /// /// The list of customer ids; Mandatory /// /// /// List of customer Ids /// /// /// AifCollectionTypeAttribute is used to define strongly typed containers for data /// [SysEntryPointAttribute(true), AifCollectionTypeAttribute('return', Types::String), AifCollectionTypeAttribute('_custList', Types::String)] public List retrieveCustomerNames(List _custList) { ListEnumerator listEnum = _custList.getEnumerator(); List resultSet = new List(Types::String); CustTable custTable; while (listEnum.moveNext()) { selectfirstOnly custTable where custTable.AccountNum == listEnum.current(); if (custTable) { resultSet.addEnd(custTable.AccountNum + “: “+ custTable.name()); } else { resultSet.addEnd(listEnum.current() + “: Customer not found”); } } return resultSet; }  Note: There are many metadata attributes specifed here. The first one is the AifCollectionTypeAttribute. This class has been developed to create strongly typed collections for data that you need to communicate. Here the return type if List (A collection object). AifCollectionTypeAttribute defines the type of data the list holds. When this service operation is exposed, the return type for the operation will be corresponding data type array (in this case a string array). The SysEntryPointAttribute indicates what authorization checks are performed for a method that is called on the server. This attribute must be set for all service operations. Value ‘true’ indicates authorization checks are performed on the calling user for all tables accessed by the method. Value ‘false’ indicates authorization checks are not performed on any tables accessed by the method. (You may have noticed that processReport method for any Data Provider class has this value set to false). Note: There are many metadata attributes specifed here. The first one is the AifCollectionTypeAttribute. This class has been developed to create strongly typed collections for data that you need to communicate. Here the return type if List (A collection object). AifCollectionTypeAttribute defines the type of data the list holds. When this service operation is exposed, the return type for the operation will be corresponding data type array (in this case a string array). The SysEntryPointAttribute indicates what authorization checks are performed for a method that is called on the server. This attribute must be set for all service operations. Value ‘true’ indicates authorization checks are performed on the calling user for all tables accessed by the method. Value ‘false’ indicates authorization checks are not performed on any tables accessed by the method. (You may have noticed that processReport method for any Data Provider class has this value set to false). The service operations should not be named as create, read, update delete, find etc. These names are exclusively reserved for methods on AIF Service classes. If you use these method names in your custom service, you will face errors while deploying them. The service operations should not be named as create, read, update delete, find etc. These names are exclusively reserved for methods on AIF Service classes. If you use these method names in your custom service, you will face errors while deploying them.Create Custom Service
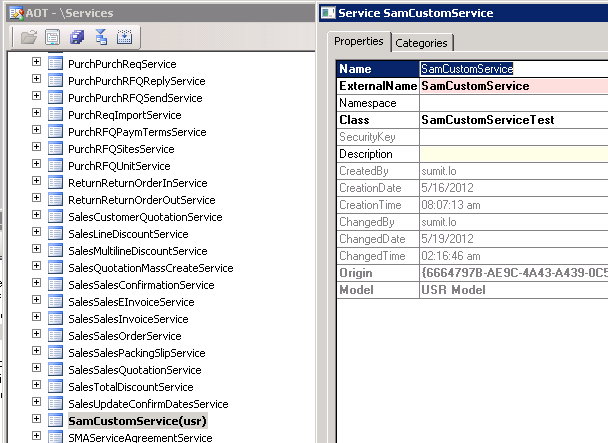
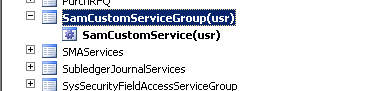
 Save the service and your service is ready now. 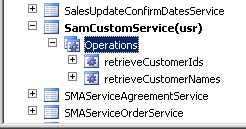 Create and Deploy Service Group
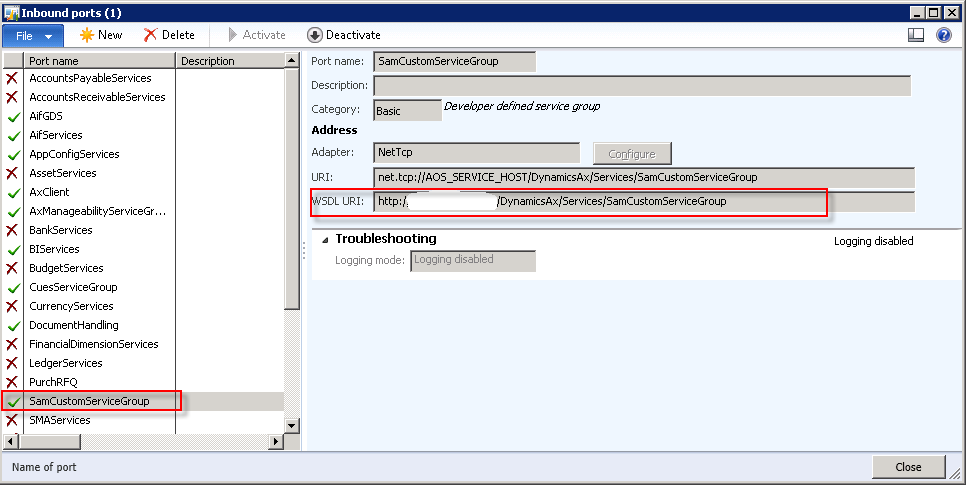
 Verify the Deployment
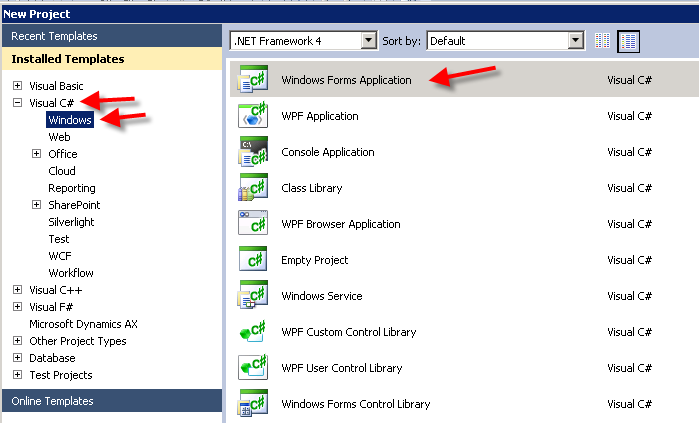
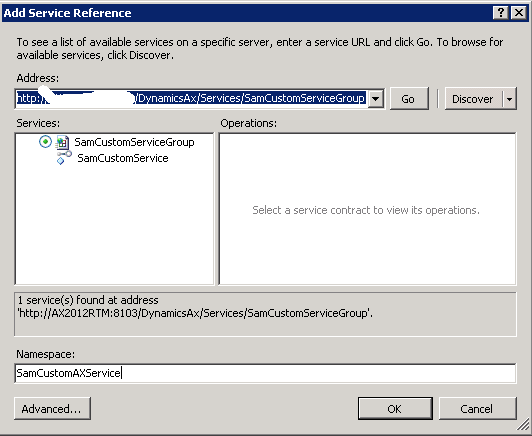
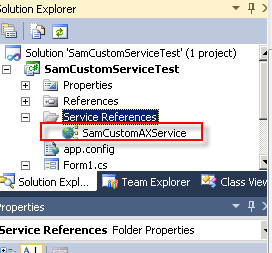
 Consuming Custom Service in Visual Studio (C#) Now that the custom service is ready, let us go ahead and use that in a .Net Application. For that open your Visual Studio 2008 or 2010 development environment and do the following
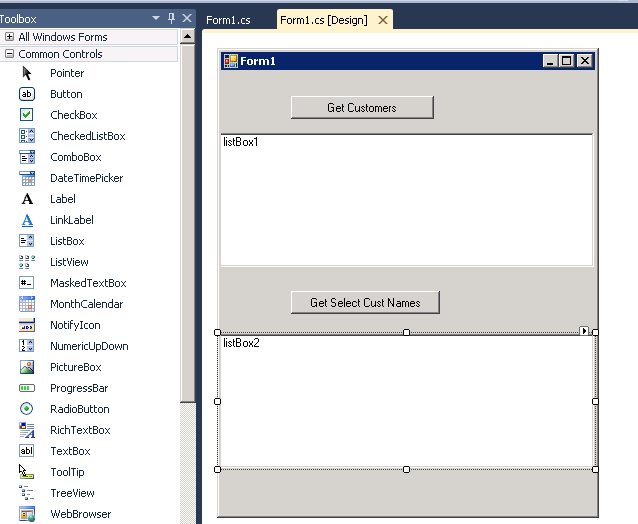
{ SamCustomAXService.SamCustomServiceClient servClient = new SamCustomAXService.SamCustomServiceClient(); string[] custIds = servClient.retrieveCustomerIds(new SamCustomAXService.CallContext()); listBox1.Items.Clear(); foreach (string custId in custIds) listBox1.Items.Add(custId); }
{ SamCustomAXService.SamCustomServiceClient servClient = new SamCustomAXService.SamCustomServiceClient(); string[] strItem = null; int i = 0; strItem = newstring[listBox1.SelectedItems.Count]; //Get selected customer ids and prepare a string array foreach (Object selecteditem in listBox1.SelectedItems) { string item = selecteditem asstring; strItem[i++] = item; } //Use the string array to get the “Customer Id: Customer Name” Combo data string[] custIds = servClient.retrieveCustomerNames(new SamCustomAXService.CallContext(), strItem); listBox2.Items.Clear(); foreach (string custId in custIds) listBox2.Items.Add(custId); }
 This concludes the session on creating custom services. To conclude, this is something really cool that MS has introduced in AX. Happy servicing the AX guys  . Next stop Data Contracts in Services. . Next stop Data Contracts in Services.        Источник: http://sumitsaxfactor.wordpress.com/...rvice-ax-2012/
__________________
Расскажите о новых и интересных блогах по Microsoft Dynamics, напишите личное сообщение администратору. |
|
|
|
|
|


 Линейный вид

