Источник:
https://www.powerobjects.com/2018/10...er-engagement/
==============

Take action on data across multiple cloud services with Microsoft Flow. No code required! Use a visual editor to design a logical flow which automates routines and saves you time and frustration. Microsoft Flow has over 170 connectors, including Dynamics 365, and it has capabilities which complement those of the in-app Dynamics 365 workflow editor.
Today we’ll talk about one exciting feature. Microsoft Flow has an action called ‘apply to each’ which can loop through a set of records on the many side of a one-to-many of a relationship and interact with each of them. Let’s see how it works.
We have a business requirement that when the Main Phone number of an account changes, we want to copy the account Main Phone number into the Company Phone field for all the related contacts. In the past this would have required code because with a one-to-many relationship, like that of accounts to their related contacts, Dynamics 365 workflow processes cannot access existing records on the many side when the workflow is triggered from a record on the one side. The great news is now we can do this with Microsoft Flow!
Summary of steps:
- Create a flow which will trigger when an account record is updated in Dynamics 365
- Create an action which uses an OData filter query to list all of the active contacts related to the account which triggered the flow
- Create an action inside a for each container which updates each contact with a value from the account
Considerations:
- The Flow for Dynamics 365 plan includes 2000 runs per month (aggregated for all users), unlimited flow creation and 5-minute checks. For more flow runs, faster checks, premium connectors and management options, see Microsoft Flow pricing.
- The user who creates the flow must have necessary permissions in Dynamics 365.
- Any update on the record will trigger the flow, there is no filtration at this point.
Let’s get started:
Sign in to the
Microsoft Flow website.
Click or tap
My flows, and then click or tap
Create from blank.

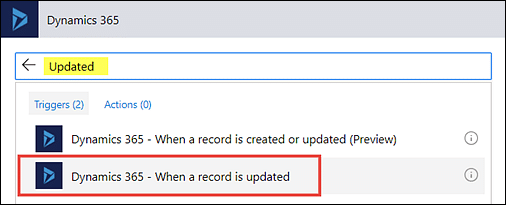
In the list of flow triggers, click or tap
Dynamics 365 – When a record is updated. (If prompted, sign in to Dynamics 365.)
(Hint: Start typing in the search box and wait a few seconds to see a filtered list of options.)
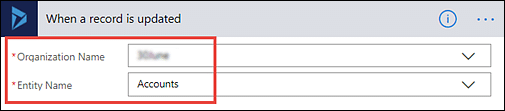
Under
Organization Name, select the Dynamics 365 instance where you want the flow to
listen.
(IMPORTANT: In order for the flow to trigger on the Dynamics 365 entity, the entity definition should have Change Tracking enabled.)
Under
Entity Name, select the entity that you want to listen to, which will act as a trigger initiating the flow. For this walkthrough, select
Accounts.
(Consider: This flow will run each time anything on an account is changed, which will count against the allotted number of runs in your Flow plan.)
Click or tap
New step, and then click or tap
Add an action.
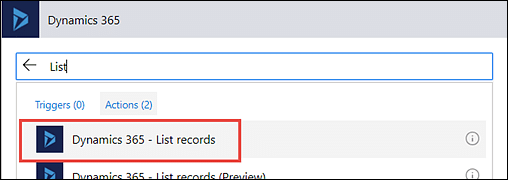
Click or tap
Dynamics 365 – List records.
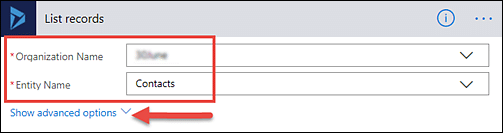
Under
Organization Name, select the same Dynamics 365 instance as the trigger.
(Note: Because we want to list contacts related to the account which triggered the flow, we choose the same Dynamics 365 instance where the event is triggered from. For other types of actions, such as create a new record, it doesn’t have to be the same instance where the event is triggered from.)
Under
Entity Name, select the entity from which to list records when the event occurs. For this walkthrough, select
Contacts.
Click or tap
Show advanced options
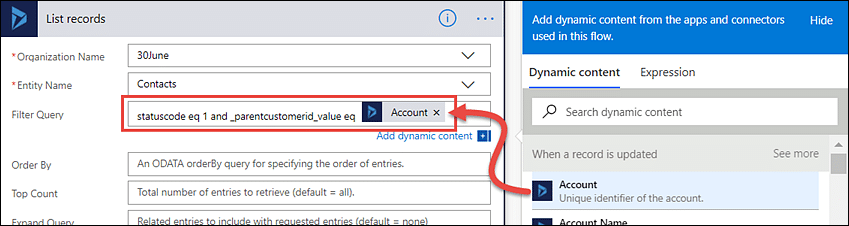
Click or tap
Filter Query. A dynamic content pane appears where you can select fields from previous steps. We can
use an OData query to filter the list to active contacts related to the account which triggered the flow.
- Enter the text statuscode eq 1 and _parentcustomerid_value eq
- From the dynamic content pane, select Account (Description: Unique identifier of the account.)
Click or tap
New step, and then click or tap
Add an action.
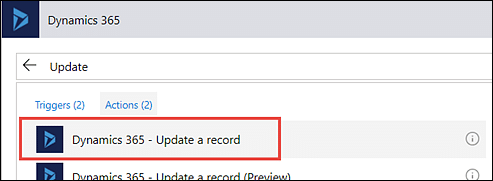
Click or tap
Dynamics 365 – Update a record.
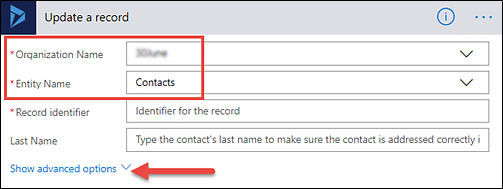
Under
Organization Name, select the same Dynamics 365 instance as the previous action.
Under
Entity Name, select the entity that will update a record when the event occurs. For this walkthrough, select
Contacts.
Click or tap
Show advanced options.
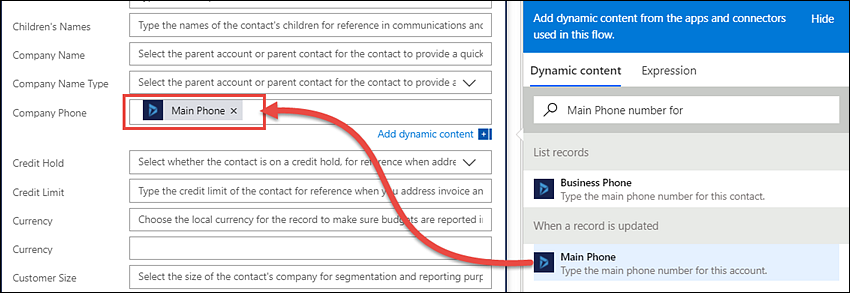
Scroll down and click or tap
Company Phone. From the dynamic content pane select
Main Phone (Description: Type the main phone number for this account.)
(Hint: You can search for words from either the field name or the field description.)
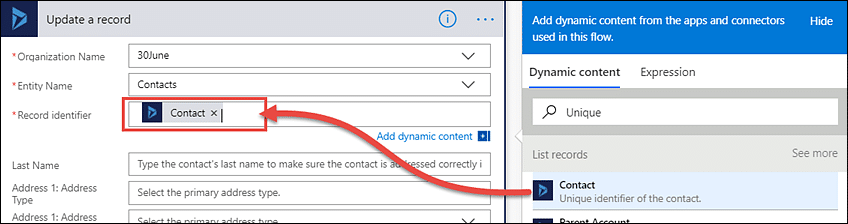
Scroll up and click or tap
Record Identifier. From the dynamic content pane select
Contact (Description: Unique identifier of the contact.)
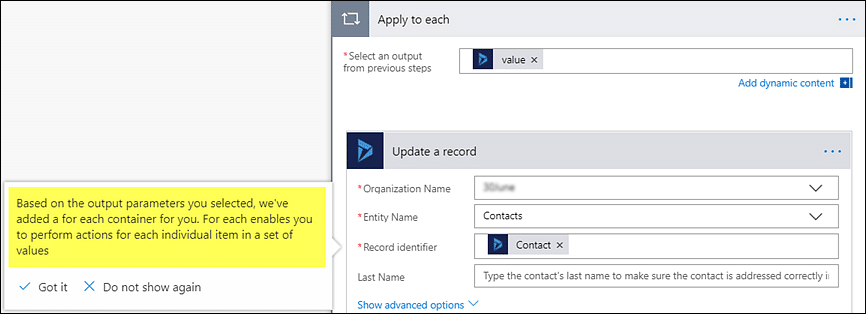
Notice that Microsoft Flow automatically nests the Update a record step inside an Apply to each step (also called a
for each container). The Apply to each action must reference output from a previous step and Microsoft Flow has automatically populated this with the dynamic content
value which refers to the records from the List records step.
(Note: Instead of creating the Update a record action first, as we did in this walkthrough, you could first add and configure the Apply to each action and then add and configure a nested Update a record action.)
Click
Save.

Make a change to an account in Dynamics 365 and test your flow. Microsoft Flow changed all of the contacts related to the account so you didn’t have to!
Be sure to
subscribe to the PowerObjects blog for more great Dynamics 365 and Microsoft biz apps content!
Happy Dynamics 365’ing!
Источник:
https://www.powerobjects.com/2018/10...er-engagement/